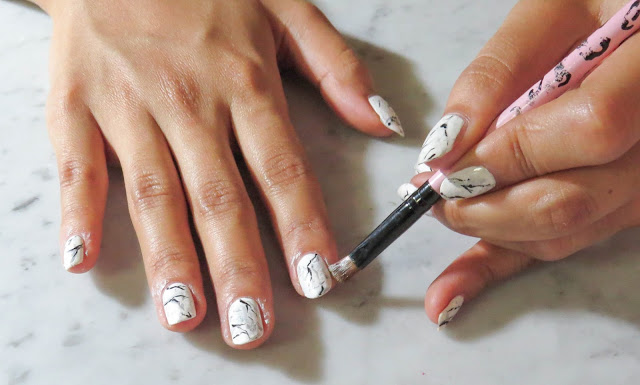
White Marble
5:28 AM
I've been really into mimicking organic patterns lately. Its always interesting to emulate the lines and colours you get in nature, and something that looks relatively simple at first can come out so odd when I first try it out.
This time round, I wanted to try painting a white marble surface. I learned a few what-not-to-dos along the way, and I hope it'll be helpful when you try this out for yourself. You will try it out, won't you? (:
So first up, grab a pretty white and paint it on so it's opaque. I used OPI's Alpine Snow, and needed 2 coats to get it to true colour.
Next, I scrunched up a ball of clingwrap as tightly as I could. This will be used as your sponging tool. The more nooks and crannies there are on your clingwrap, the more intricate the pattern you get. It was my first time trying out this technique of sponging, but its as simple as using a sponge, really. Just make sure you dab the excess paint off your clingwrap, unless you want a huge drop of paint on your nails...
First, I mixed a light grey using my acrylic paints and clingwraped them onto my nail. For this step, I made sure to do this at random - sometimes, I would dab the grey on in dense clusters, and other times I would spread it out evenly on my nail. This makes it seem more natural.
Then, I did the same with a darker grey colour to add more depth to the design. Don't worry if your fingers get a little messy along the way - we'll clean that up later.
Then, using a thin brush, I drew on some fine grey lines using the same shade of grey for the previous step. You can also use the head of a bobby pin as well, if you don't have a brush around.
When drawing on the grey cracks, let your hand shake a little. This makes the cracks look a little more authentic.
Then, follow up with black paint to add more cracks. I also found that drawing the cracks on in a generally parallel direction makes them look better.
Then, dip a concealer brush (preferably one you don't use anymore) into nail polish remover, and remove the paint on your fingers to clean up.
Seal everything with a quick dry top coat (I used my favourite: Seche Vite), and you're done! I did both my hands on separate days, and you can see the different approaches I took. I did my left hand first, and I didn't sponge on much grey. I wanted a cleaner look, at first. Then for my right hand, with the added confidence from the success of the first attempt, I decided to go bolder and use more grey. I love both though, they're pretty in their own way.
What you think?


0 comments